Fire Emblem Heroes Wiki
Advertisement

The Arena is a pseudo-PvP mode against another player's team controlled by the AI.
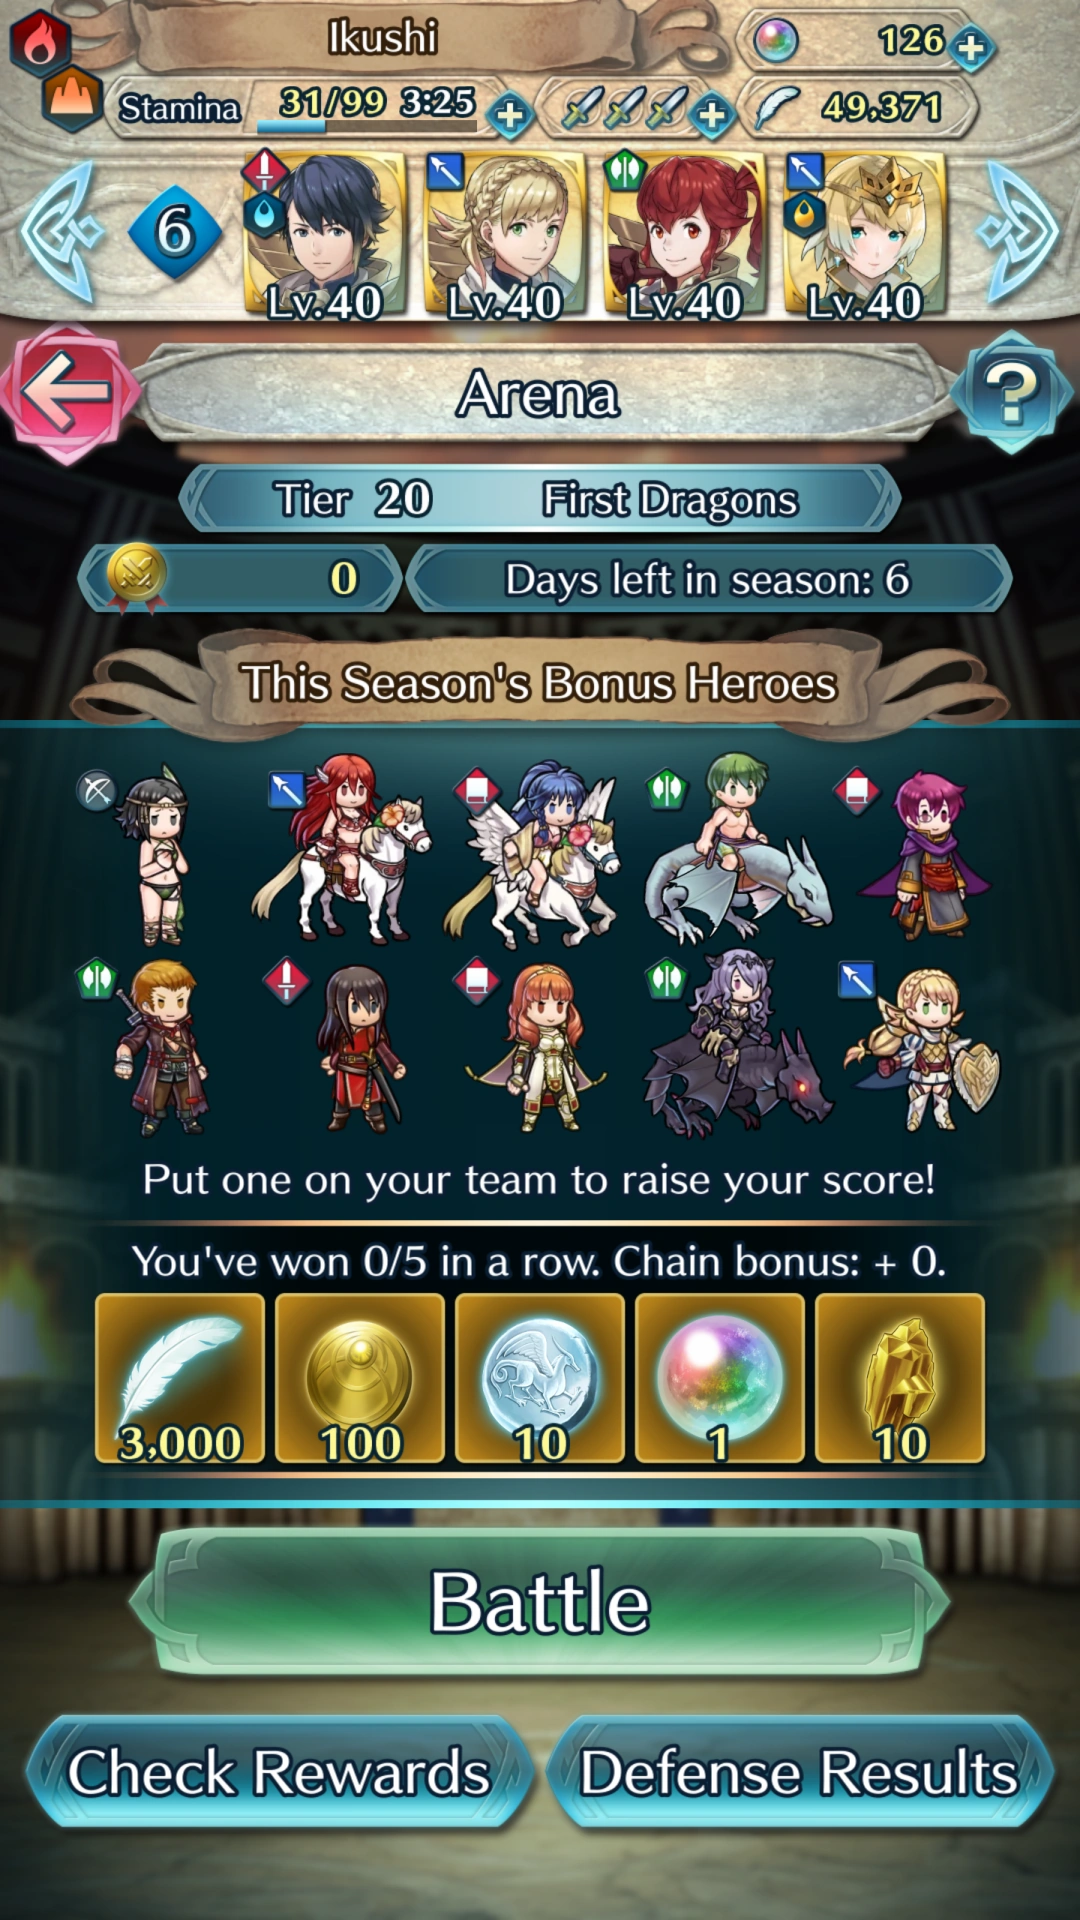
Arena

Arena Screen

Arena Basics

There are three categories in arena: Offensive Score, Defensive Score, and Rank.

Offensive score is determined by your highest sum score of winning consecutive matches with a maximum of 5 wins. Offensive score is displayed beside the gold medal shown on the top-left corner of the Arena screen.

In order to fight a match, a player must go to battle and consume a Dueling Sword (Three given daily during daily reset), which will then send the player to a screen to select an opponent. Opponents are split into 3 difficulties: Beginner, Intermediate, and Advanced. The higher the difficulty, the more points received. Using at least one bonus hero on the team will increase points gained by 2x. Each casualty incurred in a match will lower the amount of points received. Losing or surrendering during a battle will end the win streak. Details are listed in the section below.

Defensive score is determined by maximum defense score your own team wins against other people. Defensive score is displayed beside the silver medal shown on the top-left corner after selecting Defense Results.

The defense team can be set by going to Allies > Edit Team. The team with a shield next to its name is the team that will be chosen as your Defense team. The leftmost character in this team will be the one other players see when selecting you as an opponent. The stronger the opponent, the higher the defense score. Using at least one bonus hero on the team will increase points gained by 2x. Details are listed in the section below.

Total ranking will be determined by both your final offensive and defensive score and is updated hourly. Total Ranking is displayed the crown shown on the top-left corner after selecting Check Rewards.

Bonus Heroes are displayed in the Arena screen and are heroes which increase the amount of points a player can receive from a match by 2x if placed in the team.

The Arena resets every season (weekly). Each Arena season starts on Tuesday at 7:00 AM UTC and ends on Monday 11:00 PM UTC. During the downtime in between each season, rankings will be calculated to determine the amount of rewards you will receive.

Offensive Arena Scoring

The offensive aspect of arena allows a player to use their team to battle against AI-controlled teams of other players.

Teams are chosen and matched against a player with the following considerations in place:

  1. Character Levels
  2. Character Rarities
  3. Bonuses gained from Merge Allies
  4. Total base stats after removing the effects of all skills, including weapons
  5. Value of Equipped Skills (e.g. Distant Counter 300 SP is worth more points than a 200 SP skill)

Upon using a Dueling Sword to enter the Arena, three enemy teams along with their possible amount of points rewarded will be presented to the player:

  1. Beginner: This team will have a lower level of investment than the player's. Lowest rewarded score.
  2. Intermediate: This team will have a similar level of investment compared to the player's.
  3. Advanced: This team will have a higher level of investment than the player's. Highest rewarded score.

Additionally, a player can increase their offensive score rewarded by including one of that arena season's bonus heroes. Including a bonus hero on the Arena team will increase scores rewarded by 2x. It is possible to tap the unit on the bonus screen to see who it is.

However, there are penalties to the shown arena score directly related to the amount of units felled during the fight. The more units lost in battle, the less points gained from that battle. The score penalty for each loss is as follows:

Losses Score
0 Maximum Score
1 -10% (90% of Max Score)
2 -20% (80% of Max Score)
3 -30% (70% of Max Score)

Once a player wins 5 battles in a row or loses/surrenders a battle, the streak ends and the final score is added up. Surrendering when viewing which opponents to battle will use up the Dueling Sword but will not end the bonus streak. If this score is the highest the player has achieved during the season, then this score will become that player's new high score for the season.

Defensive Arena Scoring

In addition to fighting other players, the player also sets a defense team that other players will face. The defense team is the one with a shield next to its name in the team slots. All but one team is completely empty, the filled one will be used.

In order to obtain a defense score, an opponent must challenge the player's team and be defeated. If the opponent's score is higher than the player's current defense score, then that new defense score will be used.

Additionally, a player can increase their defensive score rewarded by including one of that arena season's bonus heroes. Including a bonus hero on the Arena defense team will increase scores rewarded by 2x. It is possible to tap the unit on the bonus screen to see who it is.

To view your current Defense Score and other defense information, select Defense Results from the Arena screen. Here you can view your current defense score as well as a list of successful defenses (Note that this does not include failed defenses).

Currently, it is unknown how opponent defense score teams are calculated.

Arena Rewards

The main reward for fighting in the Arena are Hero Feathers Hero Feather. Players can also receive Orbs Orb, Sacred Seal Coins Sacred Coin, Arena Medals Arena Medal Refining Stones Refining Stone.

Different rewards are provided based on performance in Win Streak, Offense score, Defense score, and Overall Ranking. The player's score can be viewed via the "Check Rewards" button on the Arena Duels home screen.

Win Streak

Consecutive victories provide rewards called Chain Rewards. These rewards can only be earned once per season.

Win Streak Reward
1 3000 Hero Feathers Hero Feather
2 100 Arena Medals Arena Medal
3 10 Sacred Coins Sacred Coin
4 1 Orb Orb
5 10 Refining Stones Refining Stone

Offense

The player gains feathers dependent on their Offense Score.

Score Refining Stones Refining Stone Sacred Coins Sacred Coin Hero Feathers Hero Feather
4,001+ 10 10 2,500
3,801 - 4,000 10 10 2,400
3,601 - 3,800 10 10 2,300
3,401 - 3,600 10 10 2,200
3,201 - 3,400 10 10 2,100
3,001 - 3,200 10 10 2,000
2,801 - 3,000 10 10 1,900
2,601 - 2,800 10 10 1,800
2,401 - 2,600 10 10 1,700
2,201 - 2,400 10 10 1,600
2,001 - 2,200 10 10 1,500
1,801 - 2,000 10 10 1,400
1,601 - 1,800 10 10 1,300
1,401 - 1,600 10 10 1,200
1,201 - 1,400 10 10 1,100
1,001 - 1,200 10 10 1,000
801 - 1,000 10 10 900
601 - 800 10 10 800
401 - 600 10 10 700
201 - 400 10 10 600
1 - 200 10 10 500

Defense

The player gains feathers dependent on their Defense score.

Score Hero Feathers Hero Feather
451+ 900
401 - 450 800
351 - 400 700
301 - 350 600
251 - 300 500
201 - 250 400
151 - 200 300
101 - 150 200
1 - 100 100

Tier: The player gains feathers and orbs dependent on the tier they are in at the end of the season. See #Arena Tiers

Arena Bonus Heroes

For a list of Arena Bonus Heroes each season, see Arena Bonus Hero List.

Arena Bonus Heroes are heroes specified each season which increase the amount of points a player can receive from a match by 2x.

The Arena Bonus Heroes selected in most seasons follow certain patterns. These patterns may be subject to change, but the currently observed patterns are as follows:

  • Beginning in Season 8, there have always been ten featured Arena Bonus heroes.
  • The first couple of heroes selected are the new heroes introduced in new summoning focuses semimonthly.
  • The earliest Grand Hero Battle hero that has not yet been in an Arena Bonus Hero rotation. Typically released approximately two weeks prior to their Arena Bonus Hero debut.
  • Starting in Season 10, Hero Battle heroes were included in the Arena Bonus Hero rotation in pairs. For example,
    Error: Table Heroes not found.
    and
    Error: Table Heroes not found.
    are the 1st and 7th heroes in the Hero Battle rotation maps,
    Error: Table Heroes not found.
    and
    Error: Table Heroes not found.
    are 2nd and 8th, etc. These heroes ended their run in Season 52.
  • Starting with Season 55, Daily GHB Revival heroes were included in the Arena Bonus Hero rotation to replace the previous Hero Battle heroes.
  • As of Season 8, one of the three starter heroes -
    Error: Table Heroes not found.
    ,
    Error: Table Heroes not found.
    , and
    Error: Table Heroes not found.
    - would always be included in the Arena Bonus Hero rotation in that order.
  • Starting with Season 51,
    Error: Table Heroes not found.
    is added to the rotation of the starter heroes and takes turns with Sharena.
  • The last remaining featured hero spots are typically filled with two random 3 ★-4 ★ or 4 ★-5 ★ heroes.

Arena Tiers

Add Crown

The Arena Crown placed on Feh rewarded to those who reach the Great Summoner rank.

All players participating in the Arena are placed into tiers. It is possible to move up tiers each Arena season depending on the player's Arena score. Maintaining a high tier rewards the player with orbs and feathers. Each arena season, the high scores of all players in each tier are compared to each other. After the season, each player can be moved up or down a number of tiers based on their current tier and which percentile of players they scored in.

The tiers, their rewards, and their criteria for switching tiers are described in the following table. Using Tier 15 as an example of how to read the table:

  1. It is impossible to go up 3 tiers from Tier 15
  2. The top 10% of players in Tier 15 will go up 2 tiers, when the season ends
  3. The following 40% of players in Tier 15 will go up 1 tier, when the season ends
  4. The following 20% of players in Tier 15 will stay in Tier 15, when the season ends
  5. The final, and lowest, 30% of players will go down 1 tier, when the season ends
Tier Title Arena Crown Orb Hero Feather Tier Promotion / Demotion Percentages
Up 3 Up 2 Up 1 Stay Down 1
21 Great Summoner 1 5 3,500 - - - 1 – 30% 31 – 100%
20 First Dragons - 4 3,000 - - 1 – 20% 21 – 30% 31 – 100%
19 Nohrian Noble - 4 2,000 - - 1 – 35% - 36 – 100%
18 Hoshidan Noble - 4 1,800 - - 1 – 40% - 41 – 100%
17 12 Deadlords - 3 1,700 - - 1 – 50% 51 – 70% 71 – 100%
16 Holy Guard - 3 1,600 - - 1 – 50% 51 – 70% 71 – 100%
15 Four-Riders Rank - 3 1,500 - 1 – 10% 11 – 50% 51 – 70% 71 – 100%
14 Imperial General - 3 1,400 1 – 5% 6 – 20% 21 – 50% 51 – 75% 76 – 100%
13 Eight Generals - 3 1,300 1 – 10% 11 – 20% 21 – 55% 56 – 75% 76 – 100%
12 Wyvern General - 3 1,200 1 – 10% 11 – 20% 21 – 55% 56 – 75% 76 – 100%
11 Great General - 2 1,100 1 – 10% 11 – 30% 31 – 55% 56 – 80% 81 – 100%
10 Knight General - 2 1,000 1 – 20% 21 – 30% 31 – 55% 56 – 80% 81 – 100%
9 Mage General - 2 900 1 – 20% 21 – 30% 31 – 55% 56 – 80% 81 – 100%
8 Archer General - 2 800 1 – 20% 21 – 30% 31 – 55% 56 – 80% 81 – 100%
7 Weissritter - 1 700 1 – 30% 31 – 40% 41 – 60% 61 – 100% -
6 Grünritter - 1 600 1 – 30% 31 – 40% 41 – 60% 61 – 100% -
5 Lanceritter - 1 500 1 – 30% 31 – 40% 41 – 60% 61 – 100% -
4 Sable Knight - 1 400 1 – 30% 31 – 40% 41 – 70% 71 – 100% -
3 Dragoon - - 300 1 – 40% 41 – 50% 51 – 70% 71 – 100% -
2 Whitewing - - 200 1 – 40% 41 – 50% 51 – 80% 81 – 100% -
1 7th Platoon Trainee - - 100 1 – 40% 41 – 50% 51 – 80% 81 – 100% -

Arena Enemy AI

Main article: Arena Enemy AI
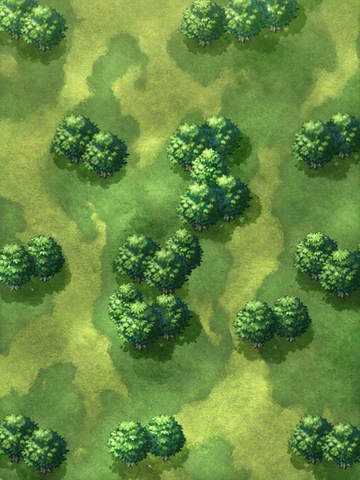
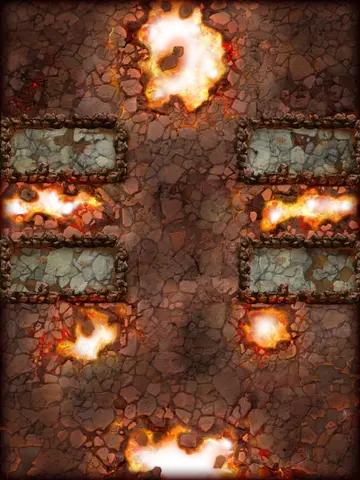
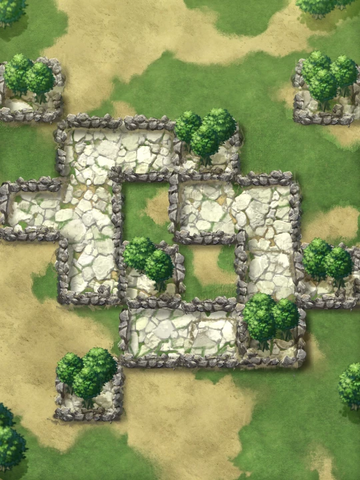
Arena Maps

For a list of all arena maps, see List of Arena Maps.

In Version 2.1.0, a new set of Arena Maps were added. The following season (Season 51), the arena map rotation schedule was then changed to accommodate these new maps.

Arena Assault does not use the same rotation as Arena. For the current rotation schedule, Arena Assault is one rotation ahead of Arena (e.g. If Arena is on Rotation 1, Arena Assault is on Rotation 2).

Rotation 3
Maps
Map Z0001
Ally Starting Spot 1
Ally Starting Spot 2
Ally Starting Spot 3
Ally Starting Spot 4
Enemy Starting Spot 1
Enemy Starting Spot 2
Enemy Starting Spot 3
Enemy Starting Spot 4
Lava
Map Z0016
Enemy Starting Spot 1
Enemy Starting Spot 2
Enemy Starting Spot 3
Enemy Starting Spot 4
Ally Starting Spot 1
Ally Starting Spot 2
Ally Starting Spot 3
Ally Starting Spot 4
Map Z0003
Enemy Starting Spot 1
Enemy Starting Spot 2
Enemy Starting Spot 3
Enemy Starting Spot 4
Wallpattern normal
Wallpattern normal
Wallpattern normal
Wallpattern normal
Wallpattern normal
Wallpattern normal
Wallpattern normal
Wallpattern normal
Wallpattern normal
Wallpattern normal
Wallpattern normal
Wallpattern normal
Wallpattern normal
Wallpattern normal
Ally Starting Spot 1
Ally Starting Spot 2
Ally Starting Spot 3
Ally Starting Spot 4
Map Z0014
Ally Starting Spot 1
Ally Starting Spot 2
Ally Starting Spot 3
Ally Starting Spot 4
Enemy Starting Spot 1
Enemy Starting Spot 2
Enemy Starting Spot 3
Enemy Starting Spot 4
Wave
Map Z0046
Wallpattern normal
Wallpattern normal
Ally Starting Spot 4
Wallpattern normal
Enemy Starting Spot 4
Ally Starting Spot 3
Enemy Starting Spot 3
Wallpattern normal
Wallpattern normal
Ally Starting Spot 2
Wallpattern normal
Wallpattern normal
Enemy Starting Spot 2
Ally Starting Spot 1
Enemy Starting Spot 1
Wallpattern normal
Wallpattern normal
Wave
Map Z0050
Ally Starting Spot 1
Ally Starting Spot 2
Ally Starting Spot 3
Ally Starting Spot 4
Wallpattern desert
Wallpattern desert
Wallpattern desert
Wallpattern desert
Wallpattern desert
Wallpattern desert
Wallpattern desert
Wallpattern desert
Wallpattern desert
Wallpattern desert
Enemy Starting Spot 3
Enemy Starting Spot 2
Wallpattern desert
Wallpattern desert
Wallpattern desert
Wallpattern desert
Enemy Starting Spot 1
Enemy Starting Spot 4
Wallpattern desert
Wallpattern desert
Wave
Map Z0053
Ally Starting Spot 1
Ally Starting Spot 2
Ally Starting Spot 3
Ally Starting Spot 4
Wallpattern inside
Wallpattern inside
Wallpattern inside
Wallpattern inside
Wallpattern inside
Wallpattern inside
Wallpattern inside
Wallpattern inside
Wallpattern inside
Wallpattern inside
Wallpattern inside
Enemy Starting Spot 1
Enemy Starting Spot 2
Enemy Starting Spot 3
Enemy Starting Spot 4
Wave
Map Z0060
Ally Starting Spot 3
Ally Starting Spot 4
Ally Starting Spot 1
Ally Starting Spot 2
Wallpattern normal
Wallpattern normal
Wallpattern normal
Wallpattern normal
Wallpattern normal
Enemy Starting Spot 2
Enemy Starting Spot 4
Enemy Starting Spot 1
Enemy Starting Spot 3
Wave
Map Z0068
Ally Starting Spot 1
Ally Starting Spot 2
Ally Starting Spot 3
Ally Starting Spot 4
Enemy Starting Spot 1
Enemy Starting Spot 2
Enemy Starting Spot 3
Enemy Starting Spot 4
Wave
Map Z0073
Ally Starting Spot 1
Ally Starting Spot 2
Ally Starting Spot 3
Ally Starting Spot 4
Wallpattern inside
Wallpattern inside
Wallpattern inside
Wallpattern inside
Wallpattern inside
Wallpattern inside
Wallpattern inside
Wallpattern inside
Wallpattern inside
Wallpattern inside
Wallpattern inside
Wallpattern inside
Wallpattern inside
Enemy Starting Spot 1
Enemy Starting Spot 2
Enemy Starting Spot 3
Enemy Starting Spot 4
Rotation 4
Maps
Wave
Map Z0035
Ally Starting Spot 3
Ally Starting Spot 4
Ally Starting Spot 1
Ally Starting Spot 2
Enemy Starting Spot 3
Enemy Starting Spot 4
Enemy Starting Spot 1
Enemy Starting Spot 2
Wave
Map Z0032
Ally Starting Spot 4
Enemy Starting Spot 4
Ally Starting Spot 3
Wallpattern desert
Enemy Starting Spot 3
Ally Starting Spot 2
Wallpattern desert
Enemy Starting Spot 2
Ally Starting Spot 1
Enemy Starting Spot 1
Wave
Map Z0044
Ally Starting Spot 1
Ally Starting Spot 2
Ally Starting Spot 3
Ally Starting Spot 4
Wallpattern inside
Wallpattern inside
Wallpattern inside
Wallpattern inside
Wallpattern inside
Wallpattern inside
Wallpattern inside
Wallpattern inside
Wallpattern inside
Wallpattern inside
Enemy Starting Spot 1
Enemy Starting Spot 2
Enemy Starting Spot 3
Enemy Starting Spot 4
Wallpattern inside
Wave
Map Z0054
Ally Starting Spot 4
Wallpattern normal
Ally Starting Spot 3
Wallpattern normal
Wallpattern normal
Enemy Starting Spot 4
Enemy Starting Spot 3
Ally Starting Spot 2
Ally Starting Spot 1
Enemy Starting Spot 2
Enemy Starting Spot 1
Wave
Map Z0041
Ally Starting Spot 3
Ally Starting Spot 4
Ally Starting Spot 1
Ally Starting Spot 2
Wallpattern inside
Wallpattern inside
Wallpattern inside
Wallpattern inside
Wallpattern inside
Wallpattern inside
Wallpattern inside
Wallpattern inside
Wallpattern inside
Enemy Starting Spot 2
Enemy Starting Spot 4
Enemy Starting Spot 1
Enemy Starting Spot 3
Wave
Map Z0051
Enemy Starting Spot 1
Enemy Starting Spot 2
Enemy Starting Spot 3
Enemy Starting Spot 4
Wallpattern normal
Wallpattern normal
Wallpattern normal
Wallpattern normal
Wallpattern normal
Wallpattern normal
Wallpattern normal
Ally Starting Spot 3
Ally Starting Spot 4
Ally Starting Spot 1
Ally Starting Spot 2
Wallpattern normal
Wave
Map Z0010
Ally Starting Spot 1
Ally Starting Spot 2
Ally Starting Spot 3
Ally Starting Spot 4
Enemy Starting Spot 1
Enemy Starting Spot 2
Enemy Starting Spot 3
Enemy Starting Spot 4
Wave
Map Z0058
Ally Starting Spot 1
Ally Starting Spot 2
Ally Starting Spot 3
Ally Starting Spot 4
Wallpattern desert
Wallpattern desert
Enemy Starting Spot 1
Enemy Starting Spot 2
Enemy Starting Spot 3
Enemy Starting Spot 4
Wave
Map Z0069
Ally Starting Spot 2
Ally Starting Spot 3
Ally Starting Spot 4
Ally Starting Spot 1
Enemy Starting Spot 4
Enemy Starting Spot 1
Enemy Starting Spot 2
Enemy Starting Spot 3
Wave
Map Z0074
Ally Starting Spot 1
Ally Starting Spot 2
Ally Starting Spot 3
Ally Starting Spot 4
Wallpattern desert
Wallpattern desert
Enemy Starting Spot 1
Enemy Starting Spot 2
Enemy Starting Spot 3
Enemy Starting Spot 4
Rotation 5
Maps
Wave
Map Z0065
Ally Starting Spot 3
Ally Starting Spot 4
Wallpattern inside
Wallpattern inside
Ally Starting Spot 1
Ally Starting Spot 2
Wallpattern inside
Wallpattern inside
Wallpattern inside
Wallpattern inside
Wallpattern inside
Wallpattern inside
Wallpattern inside
Wallpattern inside
Wallpattern inside
Wallpattern inside
Wallpattern inside
Wallpattern inside
Wallpattern inside
Wallpattern inside
Wallpattern inside
Wallpattern inside
Enemy Starting Spot 3
Enemy Starting Spot 4
Wallpattern inside
Wallpattern inside
Enemy Starting Spot 1
Enemy Starting Spot 2
Wave
Map Z0015
Ally Starting Spot 1
Ally Starting Spot 2
Ally Starting Spot 3
Ally Starting Spot 4
Enemy Starting Spot 1
Enemy Starting Spot 2
Enemy Starting Spot 3
Enemy Starting Spot 4
Wave
Map Z0040
Ally Starting Spot 2
Ally Starting Spot 3
Ally Starting Spot 4
Ally Starting Spot 1
Enemy Starting Spot 3
Enemy Starting Spot 4
Enemy Starting Spot 1
Enemy Starting Spot 2
Wave
Map Z0045
Wallpattern inside
Wallpattern inside
Wallpattern inside
Wallpattern inside
Wallpattern inside
Wallpattern inside
Ally Starting Spot 4
Enemy Starting Spot 4
Ally Starting Spot 3
Enemy Starting Spot 3
Wallpattern inside
Wallpattern inside
Wallpattern inside
Ally Starting Spot 2
Enemy Starting Spot 2
Ally Starting Spot 1
Enemy Starting Spot 1
Wallpattern inside
Wallpattern inside
Map Z0011
Ally Starting Spot 1
Ally Starting Spot 2
Ally Starting Spot 3
Ally Starting Spot 4
Wallpattern normal
Wallpattern normal
Wallpattern normal
Wallpattern normal
Wallpattern normal
Wallpattern normal
Wallpattern normal
Wallpattern normal
Enemy Starting Spot 1
Enemy Starting Spot 2
Enemy Starting Spot 3
Enemy Starting Spot 4
Wave
Map Z0052
Ally Starting Spot 3
Ally Starting Spot 4
Ally Starting Spot 1
Ally Starting Spot 2
Wallpattern desert
Wallpattern desert
Wallpattern desert
Wallpattern desert
Wallpattern desert
Enemy Starting Spot 1
Enemy Starting Spot 4
Enemy Starting Spot 2
Enemy Starting Spot 3
Map Z0019
Ally Starting Spot 1
Ally Starting Spot 2
Ally Starting Spot 3
Ally Starting Spot 4
Enemy Starting Spot 1
Enemy Starting Spot 2
Enemy Starting Spot 3
Enemy Starting Spot 4
Map Z0006
Ally Starting Spot 1
Ally Starting Spot 2
Ally Starting Spot 3
Ally Starting Spot 4
Wallpattern inside
Wallpattern inside
Wallpattern inside
Wallpattern inside
Wallpattern inside
Wallpattern inside
Wallpattern inside
Wallpattern inside
Wallpattern inside
Wallpattern inside
Wallpattern inside
Wallpattern inside
Enemy Starting Spot 1
Enemy Starting Spot 2
Enemy Starting Spot 3
Enemy Starting Spot 4
Wave
Map Z0070
Ally Starting Spot 4
Wallpattern inside
Wallpattern inside
Enemy Starting Spot 4
Ally Starting Spot 3
Wallpattern inside
Wallpattern inside
Enemy Starting Spot 3
Ally Starting Spot 2
Wallpattern inside
Enemy Starting Spot 2
Ally Starting Spot 1
Enemy Starting Spot 1
Wave
Map Z0075
Ally Starting Spot 3
Ally Starting Spot 4
Ally Starting Spot 1
Ally Starting Spot 2
Wallpattern normal
Wallpattern normal
Wallpattern normal
Wallpattern normal
Wallpattern normal
Enemy Starting Spot 3
Enemy Starting Spot 4
Enemy Starting Spot 1
Enemy Starting Spot 2
Rotation 6
Maps
Map Z0008
Ally Starting Spot 1
Ally Starting Spot 2
Ally Starting Spot 3
Ally Starting Spot 4
Enemy Starting Spot 1
Enemy Starting Spot 2
Enemy Starting Spot 3
Enemy Starting Spot 4
Wave
Map Z0061
Wallpattern desert
Wallpattern desert
Wallpattern desert
Wallpattern desert
Enemy Starting Spot 4
Wallpattern desert
Wallpattern desert
Wallpattern desert
Enemy Starting Spot 1
Enemy Starting Spot 3
Wallpattern desert
Wallpattern desert
Wallpattern desert
Enemy Starting Spot 2
Wallpattern desert
Wallpattern desert
Wallpattern desert
Ally Starting Spot 4
Ally Starting Spot 2
Ally Starting Spot 3
Ally Starting Spot 1
Wave
Map Z0055
Ally Starting Spot 1
Ally Starting Spot 2
Ally Starting Spot 3
Ally Starting Spot 4
Wallpattern desert
Wallpattern desert
Wallpattern desert
Wallpattern desert
Enemy Starting Spot 1
Enemy Starting Spot 4
Enemy Starting Spot 2
Enemy Starting Spot 3
Wave
Map Z0063
Enemy Starting Spot 1
Enemy Starting Spot 2
Enemy Starting Spot 3
Enemy Starting Spot 4
Wallpattern normal
Ally Starting Spot 3
Ally Starting Spot 4
Ally Starting Spot 1
Ally Starting Spot 2
Wave
Map Z0041
Ally Starting Spot 3
Ally Starting Spot 4
Ally Starting Spot 1
Ally Starting Spot 2
Wallpattern inside
Wallpattern inside
Wallpattern inside
Wallpattern inside
Wallpattern inside
Wallpattern inside
Wallpattern inside
Wallpattern inside
Wallpattern inside
Enemy Starting Spot 2
Enemy Starting Spot 4
Enemy Starting Spot 1
Enemy Starting Spot 3
Wave
Map Z0051
Enemy Starting Spot 1
Enemy Starting Spot 2
Enemy Starting Spot 3
Enemy Starting Spot 4
Wallpattern normal
Wallpattern normal
Wallpattern normal
Wallpattern normal
Wallpattern normal
Wallpattern normal
Wallpattern normal
Ally Starting Spot 3
Ally Starting Spot 4
Ally Starting Spot 1
Ally Starting Spot 2
Wallpattern normal
Wave
Map Z0010
Ally Starting Spot 1
Ally Starting Spot 2
Ally Starting Spot 3
Ally Starting Spot 4
Enemy Starting Spot 1
Enemy Starting Spot 2
Enemy Starting Spot 3
Enemy Starting Spot 4
Wave
Map Z0058
Ally Starting Spot 1
Ally Starting Spot 2
Ally Starting Spot 3
Ally Starting Spot 4
Wallpattern desert
Wallpattern desert
Enemy Starting Spot 1
Enemy Starting Spot 2
Enemy Starting Spot 3
Enemy Starting Spot 4
Wave
Map Z0069
Ally Starting Spot 2
Ally Starting Spot 3
Ally Starting Spot 4
Ally Starting Spot 1
Enemy Starting Spot 4
Enemy Starting Spot 1
Enemy Starting Spot 2
Enemy Starting Spot 3
Wave
Map Z0071
Ally Starting Spot 3
Ally Starting Spot 4
Ally Starting Spot 1
Ally Starting Spot 2
Wallpattern desert
Wallpattern desert
Enemy Starting Spot 3
Enemy Starting Spot 4
Enemy Starting Spot 1
Enemy Starting Spot 2
Rotation 7
Maps
Wave
Map Z0065
Ally Starting Spot 3
Ally Starting Spot 4
Wallpattern inside
Wallpattern inside
Ally Starting Spot 1
Ally Starting Spot 2
Wallpattern inside
Wallpattern inside
Wallpattern inside
Wallpattern inside
Wallpattern inside
Wallpattern inside
Wallpattern inside
Wallpattern inside
Wallpattern inside
Wallpattern inside
Wallpattern inside
Wallpattern inside
Wallpattern inside
Wallpattern inside
Wallpattern inside
Wallpattern inside
Enemy Starting Spot 3
Enemy Starting Spot 4
Wallpattern inside
Wallpattern inside
Enemy Starting Spot 1
Enemy Starting Spot 2
Lava
Map Z0016
Enemy Starting Spot 1
Enemy Starting Spot 2
Enemy Starting Spot 3
Enemy Starting Spot 4
Ally Starting Spot 1
Ally Starting Spot 2
Ally Starting Spot 3
Ally Starting Spot 4
Wave
Map Z0046
Wallpattern normal
Wallpattern normal
Ally Starting Spot 4
Wallpattern normal
Enemy Starting Spot 4
Ally Starting Spot 3
Enemy Starting Spot 3
Wallpattern normal
Wallpattern normal
Ally Starting Spot 2
Wallpattern normal
Wallpattern normal
Enemy Starting Spot 2
Ally Starting Spot 1
Enemy Starting Spot 1
Wallpattern normal
Wallpattern normal
Wave
Map Z0050
Ally Starting Spot 1
Ally Starting Spot 2
Ally Starting Spot 3
Ally Starting Spot 4
Wallpattern desert
Wallpattern desert
Wallpattern desert
Wallpattern desert
Wallpattern desert
Wallpattern desert
Wallpattern desert
Wallpattern desert
Wallpattern desert
Wallpattern desert
Enemy Starting Spot 3
Enemy Starting Spot 2
Wallpattern desert
Wallpattern desert
Wallpattern desert
Wallpattern desert
Enemy Starting Spot 1
Enemy Starting Spot 4
Wallpattern desert
Wallpattern desert
Map Z0011
Ally Starting Spot 1
Ally Starting Spot 2
Ally Starting Spot 3
Ally Starting Spot 4
Wallpattern normal
Wallpattern normal
Wallpattern normal
Wallpattern normal
Wallpattern normal
Wallpattern normal
Wallpattern normal
Wallpattern normal
Enemy Starting Spot 1
Enemy Starting Spot 2
Enemy Starting Spot 3
Enemy Starting Spot 4
Wave
Map Z0052
Ally Starting Spot 3
Ally Starting Spot 4
Ally Starting Spot 1
Ally Starting Spot 2
Wallpattern desert
Wallpattern desert
Wallpattern desert
Wallpattern desert
Wallpattern desert
Enemy Starting Spot 1
Enemy Starting Spot 4
Enemy Starting Spot 2
Enemy Starting Spot 3
Map Z0005
Ally Starting Spot 4
Ally Starting Spot 3
Enemy Starting Spot 4
Enemy Starting Spot 3
Enemy Starting Spot 2
Ally Starting Spot 2
Enemy Starting Spot 1
Ally Starting Spot 1
Wave
Map Z0048
Enemy Starting Spot 1
Enemy Starting Spot 2
Enemy Starting Spot 3
Enemy Starting Spot 4
Wallpattern inside
Wallpattern inside
Wallpattern inside
Wallpattern inside
Wallpattern inside
Wallpattern inside
Wallpattern inside
Wallpattern inside
Wallpattern inside
Wallpattern inside
Wallpattern inside
Ally Starting Spot 1
Ally Starting Spot 2
Ally Starting Spot 3
Ally Starting Spot 4
Wave
Map Z0070
Ally Starting Spot 4
Wallpattern inside
Wallpattern inside
Enemy Starting Spot 4
Ally Starting Spot 3
Wallpattern inside
Wallpattern inside
Enemy Starting Spot 3
Ally Starting Spot 2
Wallpattern inside
Enemy Starting Spot 2
Ally Starting Spot 1
Enemy Starting Spot 1
Wave
Map Z0075
Ally Starting Spot 3
Ally Starting Spot 4
Ally Starting Spot 1
Ally Starting Spot 2
Wallpattern normal
Wallpattern normal
Wallpattern normal
Wallpattern normal
Wallpattern normal
Enemy Starting Spot 3
Enemy Starting Spot 4
Enemy Starting Spot 1
Enemy Starting Spot 2
Rotation 8
Maps
Map Z0019
Ally Starting Spot 1
Ally Starting Spot 2
Ally Starting Spot 3
Ally Starting Spot 4
Enemy Starting Spot 1
Enemy Starting Spot 2
Enemy Starting Spot 3
Enemy Starting Spot 4
Map Z0006
Ally Starting Spot 1
Ally Starting Spot 2
Ally Starting Spot 3
Ally Starting Spot 4
Wallpattern inside
Wallpattern inside
Wallpattern inside
Wallpattern inside
Wallpattern inside
Wallpattern inside
Wallpattern inside
Wallpattern inside
Wallpattern inside
Wallpattern inside
Wallpattern inside
Wallpattern inside
Enemy Starting Spot 1
Enemy Starting Spot 2
Enemy Starting Spot 3
Enemy Starting Spot 4
Wave
Map Z0038
Ally Starting Spot 4
Ally Starting Spot 2
Ally Starting Spot 3
Ally Starting Spot 1
Enemy Starting Spot 2
Enemy Starting Spot 3
Enemy Starting Spot 4
Enemy Starting Spot 1
Map Z0014
Ally Starting Spot 1
Ally Starting Spot 2
Ally Starting Spot 3
Ally Starting Spot 4
Enemy Starting Spot 1
Enemy Starting Spot 2
Enemy Starting Spot 3
Enemy Starting Spot 4
Wave
Map Z0033
Wallpattern inside
Ally Starting Spot 3
Ally Starting Spot 4
Wallpattern inside
Ally Starting Spot 1
Wallpattern inside
Ally Starting Spot 2
Wallpattern inside
Wallpattern inside
Wallpattern inside
Wallpattern inside
Wallpattern inside
Wallpattern inside
Enemy Starting Spot 1
Enemy Starting Spot 4
Wallpattern inside
Enemy Starting Spot 2
Enemy Starting Spot 3
Wave
Map Z0043
Ally Starting Spot 3
Ally Starting Spot 4
Ally Starting Spot 1
Ally Starting Spot 2
Wallpattern normal
Wallpattern normal
Wallpattern normal
Enemy Starting Spot 3
Enemy Starting Spot 4
Enemy Starting Spot 1
Enemy Starting Spot 2
Wave
Map Z0057
Ally Starting Spot 1
Ally Starting Spot 2
Ally Starting Spot 3
Ally Starting Spot 4
Enemy Starting Spot 1
Enemy Starting Spot 2
Enemy Starting Spot 3
Enemy Starting Spot 4
Wave
Map Z0062
Ally Starting Spot 3
Ally Starting Spot 4
Ally Starting Spot 1
Ally Starting Spot 2
Wallpattern inside
Wallpattern inside
Wallpattern inside
Wallpattern inside
Wallpattern inside
Wallpattern inside
Wallpattern inside
Wallpattern inside
Wallpattern inside
Enemy Starting Spot 2
Enemy Starting Spot 3
Wallpattern inside
Wallpattern inside
Wallpattern inside
Enemy Starting Spot 1
Enemy Starting Spot 4
Wave
Map Z0066
Enemy Starting Spot 3
Enemy Starting Spot 4
Enemy Starting Spot 1
Enemy Starting Spot 2
Wallpattern normal
Wallpattern normal
Wallpattern normal
Wallpattern normal
Wallpattern normal
Ally Starting Spot 3
Ally Starting Spot 4
Ally Starting Spot 1
Ally Starting Spot 2
Wave
Map Z0074
Ally Starting Spot 1
Ally Starting Spot 2
Ally Starting Spot 3
Ally Starting Spot 4
Wallpattern desert
Wallpattern desert
Enemy Starting Spot 1
Enemy Starting Spot 2
Enemy Starting Spot 3
Enemy Starting Spot 4
Rotation 9
Maps
Wave
Map Z0053
Ally Starting Spot 1
Ally Starting Spot 2
Ally Starting Spot 3
Ally Starting Spot 4
Wallpattern inside
Wallpattern inside
Wallpattern inside
Wallpattern inside
Wallpattern inside
Wallpattern inside
Wallpattern inside
Wallpattern inside
Wallpattern inside
Wallpattern inside
Wallpattern inside
Enemy Starting Spot 1
Enemy Starting Spot 2
Enemy Starting Spot 3
Enemy Starting Spot 4
Wave
Map Z0060
Ally Starting Spot 3
Ally Starting Spot 4
Ally Starting Spot 1
Ally Starting Spot 2
Wallpattern normal
Wallpattern normal
Wallpattern normal
Wallpattern normal
Wallpattern normal
Enemy Starting Spot 2
Enemy Starting Spot 4
Enemy Starting Spot 1
Enemy Starting Spot 3
Wave
Map Z0047
Ally Starting Spot 4
Ally Starting Spot 3
Enemy Starting Spot 4
Enemy Starting Spot 3
Ally Starting Spot 2
Ally Starting Spot 1
Enemy Starting Spot 2
Enemy Starting Spot 1
Wave
Map Z0049
Enemy Starting Spot 1
Enemy Starting Spot 2
Enemy Starting Spot 3
Enemy Starting Spot 4
Wallpattern desert
Wallpattern desert
Wallpattern desert
Wallpattern desert
Ally Starting Spot 1
Ally Starting Spot 2
Ally Starting Spot 3
Ally Starting Spot 4
Map Z0012
Ally Starting Spot 1
Ally Starting Spot 2
Ally Starting Spot 3
Ally Starting Spot 4
Enemy Starting Spot 1
Enemy Starting Spot 2
Enemy Starting Spot 3
Enemy Starting Spot 4
Wave
Map Z0036
Ally Starting Spot 3
Ally Starting Spot 4
Ally Starting Spot 1
Ally Starting Spot 2
Wallpattern normal
Wallpattern normal
Enemy Starting Spot 3
Enemy Starting Spot 4
Enemy Starting Spot 1
Enemy Starting Spot 2
Wave
Map Z0035
Ally Starting Spot 3
Ally Starting Spot 4
Ally Starting Spot 1
Ally Starting Spot 2
Enemy Starting Spot 3
Enemy Starting Spot 4
Enemy Starting Spot 1
Enemy Starting Spot 2
Wave
Map Z0032
Ally Starting Spot 4
Enemy Starting Spot 4
Ally Starting Spot 3
Wallpattern desert
Enemy Starting Spot 3
Ally Starting Spot 2
Wallpattern desert
Enemy Starting Spot 2
Ally Starting Spot 1
Enemy Starting Spot 1
Wave
Map Z0067
Ally Starting Spot 1
Ally Starting Spot 2
Ally Starting Spot 3
Ally Starting Spot 4
Wallpattern inside
Wallpattern inside
Wallpattern inside
Wallpattern inside
Wallpattern inside
Wallpattern inside
Enemy Starting Spot 1
Enemy Starting Spot 2
Enemy Starting Spot 3
Enemy Starting Spot 4
Wave
Map Z0072
Ally Starting Spot 3
Ally Starting Spot 4
Ally Starting Spot 1
Ally Starting Spot 2
Wallpattern normal
Wallpattern normal
Wallpattern normal
Wallpattern normal
Enemy Starting Spot 3
Enemy Starting Spot 4
Enemy Starting Spot 1
Enemy Starting Spot 2
Rotation 10
Maps
Map Z0001
Ally Starting Spot 1
Ally Starting Spot 2
Ally Starting Spot 3
Ally Starting Spot 4
Enemy Starting Spot 1
Enemy Starting Spot 2
Enemy Starting Spot 3
Enemy Starting Spot 4
Wave
Map Z0015
Ally Starting Spot 1
Ally Starting Spot 2
Ally Starting Spot 3
Ally Starting Spot 4
Enemy Starting Spot 1
Enemy Starting Spot 2
Enemy Starting Spot 3
Enemy Starting Spot 4
Wave
Map Z0040
Ally Starting Spot 2
Ally Starting Spot 3
Ally Starting Spot 4
Ally Starting Spot 1
Enemy Starting Spot 3
Enemy Starting Spot 4
Enemy Starting Spot 1
Enemy Starting Spot 2
Wave
Map Z0045
Wallpattern inside
Wallpattern inside
Wallpattern inside
Wallpattern inside
Wallpattern inside
Wallpattern inside
Ally Starting Spot 4
Enemy Starting Spot 4
Ally Starting Spot 3
Enemy Starting Spot 3
Wallpattern inside
Wallpattern inside
Wallpattern inside
Ally Starting Spot 2
Enemy Starting Spot 2
Ally Starting Spot 1
Enemy Starting Spot 1
Wallpattern inside
Wallpattern inside
Map Z0003
Enemy Starting Spot 1
Enemy Starting Spot 2
Enemy Starting Spot 3
Enemy Starting Spot 4
Wallpattern normal
Wallpattern normal
Wallpattern normal
Wallpattern normal
Wallpattern normal
Wallpattern normal
Wallpattern normal
Wallpattern normal
Wallpattern normal
Wallpattern normal
Wallpattern normal
Wallpattern normal
Wallpattern normal
Wallpattern normal
Ally Starting Spot 1
Ally Starting Spot 2
Ally Starting Spot 3
Ally Starting Spot 4
Lava
Map Z0004
Ally Starting Spot 1
Ally Starting Spot 2
Ally Starting Spot 3
Ally Starting Spot 4
Enemy Starting Spot 1
Enemy Starting Spot 2
Enemy Starting Spot 3
Enemy Starting Spot 4
Wave
Map Z0044
Ally Starting Spot 1
Ally Starting Spot 2
Ally Starting Spot 3
Ally Starting Spot 4
Wallpattern inside
Wallpattern inside
Wallpattern inside
Wallpattern inside
Wallpattern inside
Wallpattern inside
Wallpattern inside
Wallpattern inside
Wallpattern inside
Wallpattern inside
Enemy Starting Spot 1
Enemy Starting Spot 2
Enemy Starting Spot 3
Enemy Starting Spot 4
Wallpattern inside
Wave
Map Z0054
Ally Starting Spot 4
Wallpattern normal
Ally Starting Spot 3
Wallpattern normal
Wallpattern normal
Enemy Starting Spot 4
Enemy Starting Spot 3
Ally Starting Spot 2
Ally Starting Spot 1
Enemy Starting Spot 2
Enemy Starting Spot 1
Wave
Map Z0068
Ally Starting Spot 1
Ally Starting Spot 2
Ally Starting Spot 3
Ally Starting Spot 4
Enemy Starting Spot 1
Enemy Starting Spot 2
Enemy Starting Spot 3
Enemy Starting Spot 4
Wave
Map Z0073
Ally Starting Spot 1
Ally Starting Spot 2
Ally Starting Spot 3
Ally Starting Spot 4
Wallpattern inside
Wallpattern inside
Wallpattern inside
Wallpattern inside
Wallpattern inside
Wallpattern inside
Wallpattern inside
Wallpattern inside
Wallpattern inside
Wallpattern inside
Wallpattern inside
Wallpattern inside
Wallpattern inside
Enemy Starting Spot 1
Enemy Starting Spot 2
Enemy Starting Spot 3
Enemy Starting Spot 4
Rotation 1
Maps
Map Z0005
Ally Starting Spot 4
Ally Starting Spot 3
Enemy Starting Spot 4
Enemy Starting Spot 3
Enemy Starting Spot 2
Ally Starting Spot 2
Enemy Starting Spot 1
Ally Starting Spot 1
Wave
Map Z0048
Enemy Starting Spot 1
Enemy Starting Spot 2
Enemy Starting Spot 3
Enemy Starting Spot 4
Wallpattern inside
Wallpattern inside
Wallpattern inside
Wallpattern inside
Wallpattern inside
Wallpattern inside
Wallpattern inside
Wallpattern inside
Wallpattern inside
Wallpattern inside
Wallpattern inside
Ally Starting Spot 1
Ally Starting Spot 2
Ally Starting Spot 3
Ally Starting Spot 4
Wave
Map Z0038
Ally Starting Spot 4
Ally Starting Spot 2
Ally Starting Spot 3
Ally Starting Spot 1
Enemy Starting Spot 2
Enemy Starting Spot 3
Enemy Starting Spot 4
Enemy Starting Spot 1
Wave
Map Z0049
Enemy Starting Spot 1
Enemy Starting Spot 2
Enemy Starting Spot 3
Enemy Starting Spot 4
Wallpattern desert
Wallpattern desert
Wallpattern desert
Wallpattern desert
Ally Starting Spot 1
Ally Starting Spot 2
Ally Starting Spot 3
Ally Starting Spot 4
Wave
Map Z0033
Wallpattern inside
Ally Starting Spot 3
Ally Starting Spot 4
Wallpattern inside
Ally Starting Spot 1
Wallpattern inside
Ally Starting Spot 2
Wallpattern inside
Wallpattern inside
Wallpattern inside
Wallpattern inside
Wallpattern inside
Wallpattern inside
Enemy Starting Spot 1
Enemy Starting Spot 4
Wallpattern inside
Enemy Starting Spot 2
Enemy Starting Spot 3
Wave
Map Z0043
Ally Starting Spot 3
Ally Starting Spot 4
Ally Starting Spot 1
Ally Starting Spot 2
Wallpattern normal
Wallpattern normal
Wallpattern normal
Enemy Starting Spot 3
Enemy Starting Spot 4
Enemy Starting Spot 1
Enemy Starting Spot 2
Wave
Map Z0057
Ally Starting Spot 1
Ally Starting Spot 2
Ally Starting Spot 3
Ally Starting Spot 4
Enemy Starting Spot 1
Enemy Starting Spot 2
Enemy Starting Spot 3
Enemy Starting Spot 4
Wave
Map Z0062
Ally Starting Spot 3
Ally Starting Spot 4
Ally Starting Spot 1
Ally Starting Spot 2
Wallpattern inside
Wallpattern inside
Wallpattern inside
Wallpattern inside
Wallpattern inside
Wallpattern inside
Wallpattern inside
Wallpattern inside
Wallpattern inside
Enemy Starting Spot 2
Enemy Starting Spot 3
Wallpattern inside
Wallpattern inside
Wallpattern inside
Enemy Starting Spot 1
Enemy Starting Spot 4
Wave
Map Z0066
Enemy Starting Spot 3
Enemy Starting Spot 4
Enemy Starting Spot 1
Enemy Starting Spot 2
Wallpattern normal
Wallpattern normal
Wallpattern normal
Wallpattern normal
Wallpattern normal
Ally Starting Spot 3
Ally Starting Spot 4
Ally Starting Spot 1
Ally Starting Spot 2
Wave
Map Z0071
Ally Starting Spot 3
Ally Starting Spot 4
Ally Starting Spot 1
Ally Starting Spot 2
Wallpattern desert
Wallpattern desert
Enemy Starting Spot 3
Enemy Starting Spot 4
Enemy Starting Spot 1
Enemy Starting Spot 2
Rotation 2
Maps
Wave
Map Z0055
Ally Starting Spot 1
Ally Starting Spot 2
Ally Starting Spot 3
Ally Starting Spot 4
Wallpattern desert
Wallpattern desert
Wallpattern desert
Wallpattern desert
Enemy Starting Spot 1
Enemy Starting Spot 4
Enemy Starting Spot 2
Enemy Starting Spot 3
Wave
Map Z0063
Enemy Starting Spot 1
Enemy Starting Spot 2
Enemy Starting Spot 3
Enemy Starting Spot 4
Wallpattern normal
Ally Starting Spot 3
Ally Starting Spot 4
Ally Starting Spot 1
Ally Starting Spot 2
Wave
Map Z0047
Ally Starting Spot 4
Ally Starting Spot 3
Enemy Starting Spot 4
Enemy Starting Spot 3
Ally Starting Spot 2
Ally Starting Spot 1
Enemy Starting Spot 2
Enemy Starting Spot 1
Lava
Map Z0004
Ally Starting Spot 1
Ally Starting Spot 2
Ally Starting Spot 3
Ally Starting Spot 4
Enemy Starting Spot 1
Enemy Starting Spot 2
Enemy Starting Spot 3
Enemy Starting Spot 4
Map Z0012
Ally Starting Spot 1
Ally Starting Spot 2
Ally Starting Spot 3
Ally Starting Spot 4
Enemy Starting Spot 1
Enemy Starting Spot 2
Enemy Starting Spot 3
Enemy Starting Spot 4
Wave
Map Z0036
Ally Starting Spot 3
Ally Starting Spot 4
Ally Starting Spot 1
Ally Starting Spot 2
Wallpattern normal
Wallpattern normal
Enemy Starting Spot 3
Enemy Starting Spot 4
Enemy Starting Spot 1
Enemy Starting Spot 2
Map Z0008
Ally Starting Spot 1
Ally Starting Spot 2
Ally Starting Spot 3
Ally Starting Spot 4
Enemy Starting Spot 1
Enemy Starting Spot 2
Enemy Starting Spot 3
Enemy Starting Spot 4
Wave
Map Z0061
Wallpattern desert
Wallpattern desert
Wallpattern desert
Wallpattern desert
Enemy Starting Spot 4
Wallpattern desert
Wallpattern desert
Wallpattern desert
Enemy Starting Spot 1
Enemy Starting Spot 3
Wallpattern desert
Wallpattern desert
Wallpattern desert
Enemy Starting Spot 2
Wallpattern desert
Wallpattern desert
Wallpattern desert
Ally Starting Spot 4
Ally Starting Spot 2
Ally Starting Spot 3
Ally Starting Spot 1
Wave
Map Z0067
Ally Starting Spot 1
Ally Starting Spot 2
Ally Starting Spot 3
Ally Starting Spot 4
Wallpattern inside
Wallpattern inside
Wallpattern inside
Wallpattern inside
Wallpattern inside
Wallpattern inside
Enemy Starting Spot 1
Enemy Starting Spot 2
Enemy Starting Spot 3
Enemy Starting Spot 4
Wave
Map Z0072
Ally Starting Spot 3
Ally Starting Spot 4
Ally Starting Spot 1
Ally Starting Spot 2
Wallpattern normal
Wallpattern normal
Wallpattern normal
Wallpattern normal
Enemy Starting Spot 3
Enemy Starting Spot 4
Enemy Starting Spot 1
Enemy Starting Spot 2

Quick Tips

  1. Use a synergistic team with the highest total stats to gain the most score.
  2. Include a bonus unit in team to double the score. More bonus units do not further increase score.
  3. Only fight against Advanced players to maximize score.
  4. Avoid letting your units fall, each casualty reduces points gained!
  5. View the opposing unit's stats before initiating battle. Other players may have merged units or inherited skills.

Trivia

  • With version 1.6.0, Bonus Allies earn double EXP and SP, just like in Tempest Trials.
  • Due to an error in the Arena Defense Score in early March, Intelligent Systems apologized by giving a special one-time log-in bonus of 5 Orbs Orb between March 9, 2017 at 7:00 AM to March 23, 2017 at 6:59 AM UTC.
    • Players were compensated further by receiving 900 Hero Feathers Hero Feather per affected week as a special one-time log-in bonus on September 7, 2017.
  • Starting in Season 15 (May 9, 2017), Tier rewards replaced Ranking rewards which were as follows:
Ranking: The player gains feathers dependent on their Overall Rank. Unranked players will not receive feathers.
Rank Hero Feather
1 5,000
2 - 10 4,000
11 - 100 3,500
101 - 1,000 3,000
1,001 - 5,000 2,500
5,001 - 10,000 2,000
10,001 - 30,000 1,500
30,001 - 50,000 1,000
50,001 - 100,000 500
Advertisement